

The process of mail configuration in outlook.
Step 1 – In Outlook, open the File menu, select the Info tab and click Add Account.

Step 2 – Click Manual setup or additional server types and click Next.

Step 3 – Select POP or IMAP (or Internet Email for Outlook 2010) and click Next.

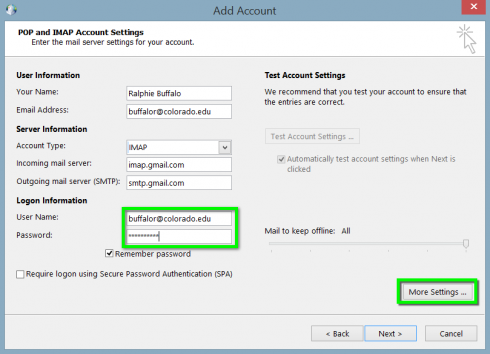
Step 4 – In the User Information section, enter:
Your name: (desired display name),
Email address: LoginName@domainname.com
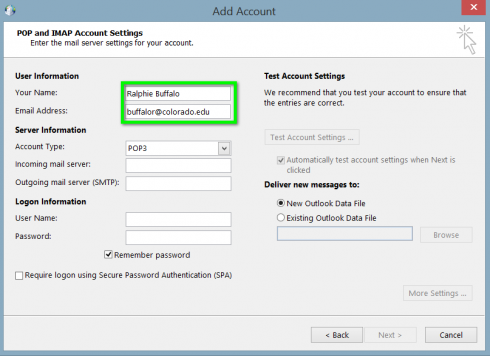
Step 5 – Enter the following for your server settings:
Account Type: IMAP/POP
Incoming mail server: pop.gmail.com / mail.your domain.com
Outgoing mail server (SMTP): smtp.gmail.com /mail.your domain.com

Step 6 – Enter the following for Logon Information then click More Settings…
User name: LoginName@domainname.com
Password: IdentiKey password
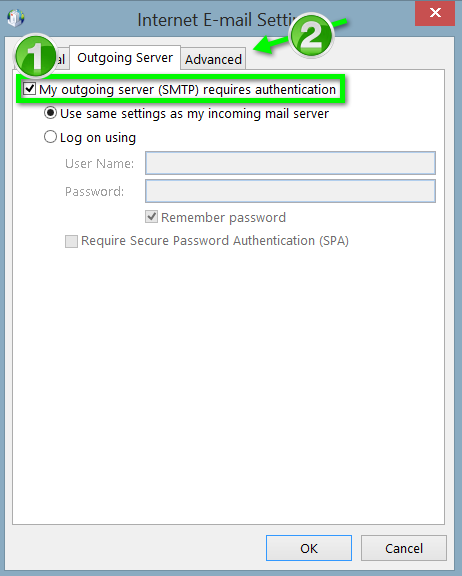
Step 7 – Click the Outgoing Server tab and check the box next to My outgoing server (SMTP) requires authentication, then click the Advanced tab.
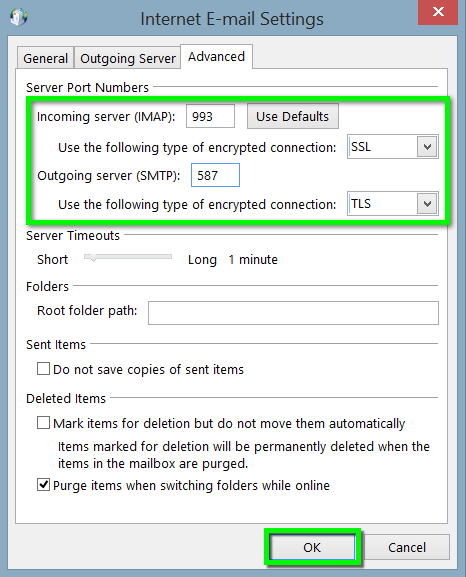
Step 8 – Adjust the server settings to the following after that click on ok.
Smtp Port : 25, (TLS) 587, (SSL)465
Pop Port : 110, (SSL)995
Imap Port : 143, (SSL)993
Step 9 – Click Next.

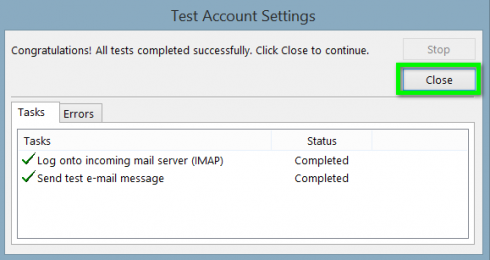
Step 10 – Outlook will test your account settings. If it completes successfully, click Close.
Step 11 – Click Finish and your account will be configured.


